In-the-Round Organic/Geometric Abstract Forms
Full in-the-round 3D Sculpture
Read through the art website below. Read carefully as he outlines step-by-step directions.
As you are reading, use a separate piece of paper and outline the major steps for creating a finished plaster sculpture. You will need to master memorize these steps for success. Read until you reach the end of work Group 4.
http://www.mmwindowtoart.com/3d/plas2.html
Workflow:
Day 1: Mix and pour your plaster.
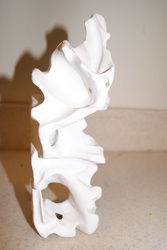
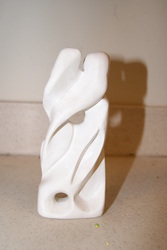
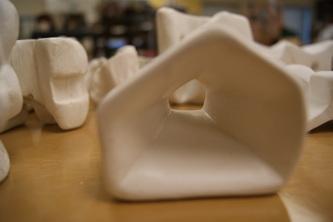
Day 2: Explore example plaster forms shown in class and on the website. Decided whether you will complete an organic or geometric abstract form. Unwrap your plaster project and dispose of the mold form. Using a pencil, begin to draw continuous lines directly on to the plaster form. Start on one side of the plaster and continue drawing the line until you circumnavigate the form. Start a new line and repeat. Lines can cross, intersect, or simply run parallel. Add three shapes that will serve as cut-outs or negative voids in your sculpture.
Day 3: Begin cutting and carving out around your pencil lines with a knife supplied by your teacher. Lose the edges of your form. The carving lines will help guide you as you make decisions about which areas should come forward and which areas should recede.
*Your final form should not resemble its original plaster form; whatsoever.
*Your final form must contain at least 3 negative voids.
*Your final form MUST be as smooth as a baby's bottom. Don't worry, I will teach you how using a variety of tools and the processes outlined in the website above.
Read through the art website below. Read carefully as he outlines step-by-step directions.
As you are reading, use a separate piece of paper and outline the major steps for creating a finished plaster sculpture. You will need to master memorize these steps for success. Read until you reach the end of work Group 4.
http://www.mmwindowtoart.com/3d/plas2.html
Workflow:
Day 1: Mix and pour your plaster.
Day 2: Explore example plaster forms shown in class and on the website. Decided whether you will complete an organic or geometric abstract form. Unwrap your plaster project and dispose of the mold form. Using a pencil, begin to draw continuous lines directly on to the plaster form. Start on one side of the plaster and continue drawing the line until you circumnavigate the form. Start a new line and repeat. Lines can cross, intersect, or simply run parallel. Add three shapes that will serve as cut-outs or negative voids in your sculpture.
Day 3: Begin cutting and carving out around your pencil lines with a knife supplied by your teacher. Lose the edges of your form. The carving lines will help guide you as you make decisions about which areas should come forward and which areas should recede.
*Your final form should not resemble its original plaster form; whatsoever.
*Your final form must contain at least 3 negative voids.
*Your final form MUST be as smooth as a baby's bottom. Don't worry, I will teach you how using a variety of tools and the processes outlined in the website above.
| plasterrevisited2.doc |
